The Importance of Setting Time Frames
Adding Subscribers to your Alerts
Scheduled alerts
A scheduled alert is an update on a KPI. For instance you may want to know what your sales metric is at 9am each day. By setting up a scheduled alert, you will receive an email at this time, giving you the latest value.
Using scheduled alerts, you can define a time period to receive notifications on your KPI.
How to set up a scheduled alert
To schedule a repeated notification for changes in your KPI, follow these steps:
-
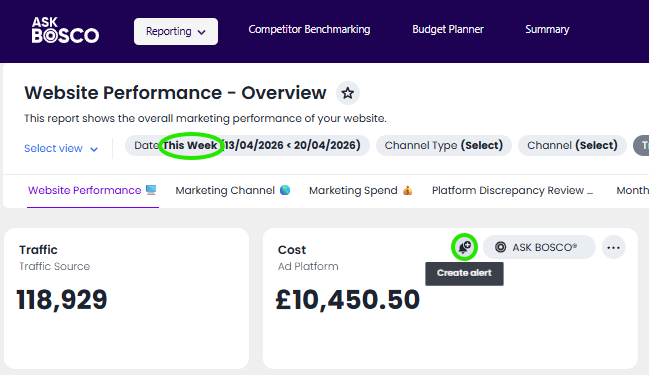
Select the KPI you want to monitor, either by accessing a dashboard, or by searching within AI Analyst. If using the AI analyst route, once you have created a KPI, pin it to a new or existing dashboard.
-
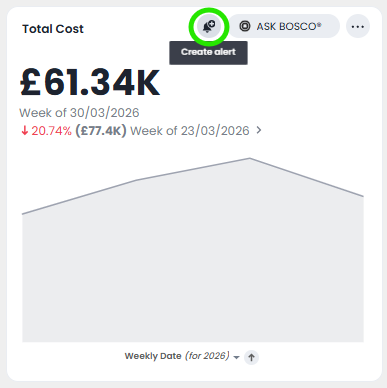
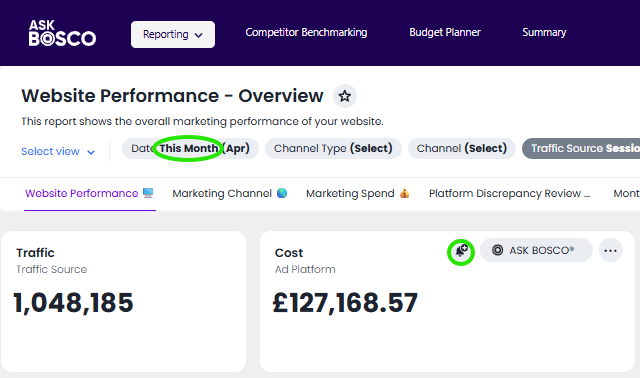
Hover over the KPI visualization and select the Create Alert icon.
-
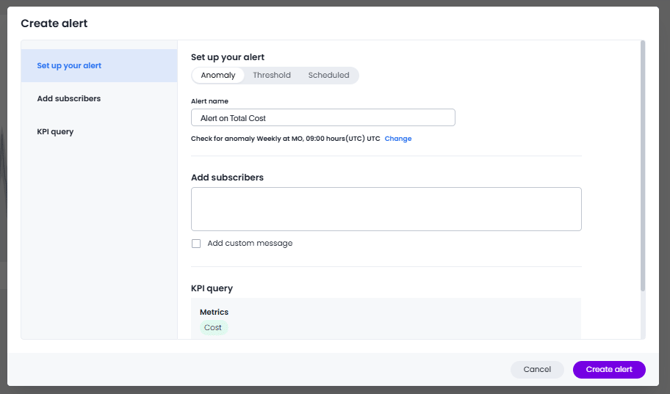
The pop-up Set up your alert window appears.
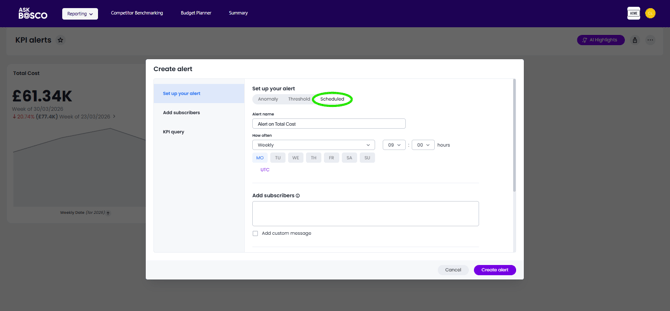
- Select Scheduled.
- Under How often, choose whether to receive an alert notification hourly, daily, weekly, or monthly.
- If Hourly, enter an hour interval to receive an alert notification Every n hours. All alerts are rounded up to the next half-hour or hour. For example, if you set an alert for 11:20am, it will be sent at 11:30am.
- If Daily, select a time of day to receive an alert notification. ASK BOSCO® displays the time zone in which your account is deployed.
[Optional] Choose whether to receive an alert notification on weekends. - If Weekly, choose a minimum of one weekday to receive an alert notification. Select a time of day to receive an alert notification as per your desired timezone.
- If Monthly, choose a minimum of one date to receive an alert notification.
Enter the date as a numerical value or a comma-separated list (for example, "5, 10, 15" to receive an alert on the fifth, tenth and fifteenth of each month). Select a time of day to receive an alert notification as per your desired timezone. - IMPORTANT! Give the Alert a name that means something rather than the generic default text. This will make things easier if you have multiple alerts for multiple channels arriving in your inbox.
So a good idea would be Website/Metric/Timeframe/Channel
eg www.askbosco.com/Cost/This week/All channels
11. Select Create Alert.
[Optional] Select the checkbox next to Add custom message and type your custom message in the text box.

Threshold alert
Using threshold alerts, you can receive alerts when your KPI reaches a set value. For example, you could create a condition to receive an alert when your Cost KPI becomes greater than 12,000 or "Changes by (%)"
How to set up a threshold alert
To create a threshold-based notification for changes in your KPI, follow these steps:
-
Select the KPI you want to monitor, either by accessing a dashboard, or by searching within AI Analyst. If using the AI analyst route, once you have created a KPI, pin it to a new or existing dashboard.
-
Hover over the KPI visualization and select the Create Alert icon.
-
The pop-up Set up your alert window appears.
-
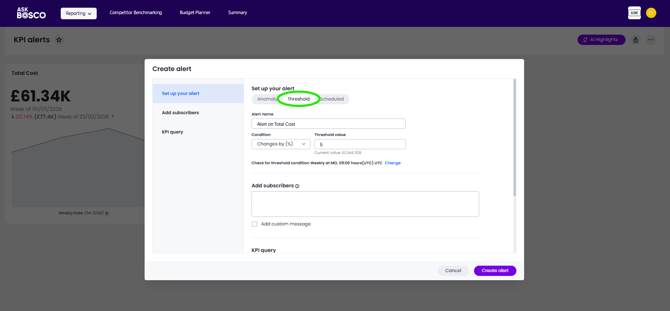
Select Threshold.
-
Enter the name of your alert under Alert name.
IMPORTANT! Give the Alert a name that means something rather than the generic default text. This will make things easier if you have multiple alerts for multiple channels arriving in your inbox.
So a good idea would be Website/Metric/Timeframe/Channel
eg www.askbosco.com/Cost/This week/All channels -
Under Condition, select the mathematical operator for your KPI alert:
-
Greater than
-
Greater than or equal to
-
Less than
-
Less than or equal to
-
Equal to
-
Not equal to
If your KPI includes a time-series keyword (such as 'weekly'), you may also select the following options for percentage changes in your KPI within the defined time bucket:
-
Changes by (%)
-
Increases by (%)
-
Decreases by (%)
-
-
-
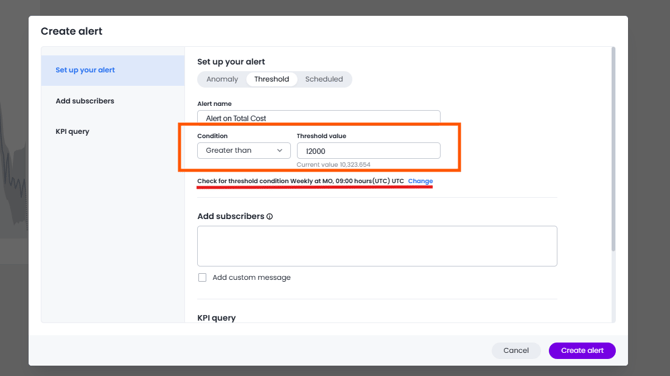
Enter your threshold value. The exact value against which the selected threshold condition will be checked appears below the Threshold value entry.
-
The default time interval to check for threshold conditions appears below the Condition entry.
Note the sentence underlined in Red above "Check for threshold condition weekly at n hours..." . This explains that ASK BOSCO® checks your threshold condition against the value displayed in your KPI chart at the time period you define. However, If your KPI temporarily satisfies the threshold condition, but does not satisfy the condition at the time the threshold condition is next checked, you will not receive an alert notification.
-
[Optional] Select change to manually schedule the frequency at which ASK BOSCO® checks your KPI for the threshold condition. For example, you can schedule to check the KPI 'Sales weekly' every week, every day, or every hour.
-
When setting up an alert, you can specify the desired timezone (e.g., "UTC") for when the alert should be sent.
[Optional] Choose whether to receive an alert notification on weekends
- Select Create Alert
Anomaly alerts
Anomaly alerts let you know when a KPI you follow is behaving unusually - outside its normal range. You can choose when and how often ASK BOSCO® checks the KPI so you get alerts at the times you want.
How to create an Anomaly Alert
To create an anomaly alert, follow these steps:
-
Select the KPI you want to monitor by accessing a dashboard, or by creating a visualization for the KPI in a new dashboard.
-
In a dashboard, hover over the KPI visualization and select the Create Alert icon.
-
The pop-up Select up your alert window appears.
-
Select Anomaly.
-
Edit the Alert name.
IMPORTANT! Give the Alert a name that means something rather than the generic default text. This will make things easier if you have multiple alerts for multiple channels arriving in your inbox.
So a good idea would be Website/Metric/Timeframe/Channel
eg www.askbosco.com/Cost/This week/All channels -
You can state how often to check for the anomaly
If Every N minutes, enter a minute interval to receive an alert notification Every N minutes.
If Hourly, enter an hour interval to receive an alert notification Every n hours. For all alert types, when the frequency is set to hourly, then it means we may send alerts at either the 30- or 60-minute mark
If Daily, select a time of day to receive an alert notification. When setting up an alert, you can specify the desired timezone (e.g., "UTC") for when the alert should be sent. [Optional] Choose whether to receive an alert notification on weekends.
If Weekly, choose a minimum of one weekday to receive an alert notification. Select a time of day to receive an alert notification in the desired timezone.
If Monthly, choose a minimum of one date to receive an alert notification.
Enter the date as a numerical value or a comma-separated list (for example, "5, 10, 15" to receive an alert on the fifth, tenth and fifteenth of each month). Select a time of day to receive an alert notification in the desired timezone.
Below the Alert name text box, ASK BOSCO® displays the cadence at which it will check the KPI against the expected data range. To change this cadence, select Change and choose from the following options:
-
[Optional] Select the checkbox next to Add custom message and type your custom message in the text box.
-
Select Create alert.
Please note for an Anomaly Alert to be generated there have to be 6 or more data points in the KPI chart you are using eg. 6 months if its a monthly view, 6 days if the KPI chart is showing daily data points.
If the warning notice appears, please adjust the date range of the KPI chart by editing it. For more information on creating KPI charts please see this article.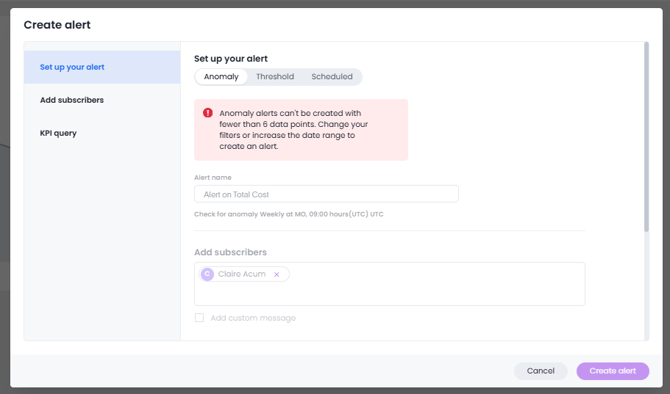
The Importance of Time Frames
It is important when you set up an alert that you are sure that you will be alerted on the data covering the time frame you expect. Also that you name the alert appropriately to tell you what time frame it covers.
For example if you want to be sent an update every morning for what you have spent 'this week' and 'this month' this requires 2 Scheduled Alerts to be set up.
This can be from the same KPI chart but certain steps will need to be taken in order that each alert reflects the time frame that you want.
Continuing using these example of 'this month' and 'this week' cost updates
This month Cost update
-
Ensure that the KPI chart is filtered to show this month's data
- Rename the alert to make it clear this alert will show data for "This Month" so that you can distinguish it when ASK BOSCO® sends the alert to your inbox
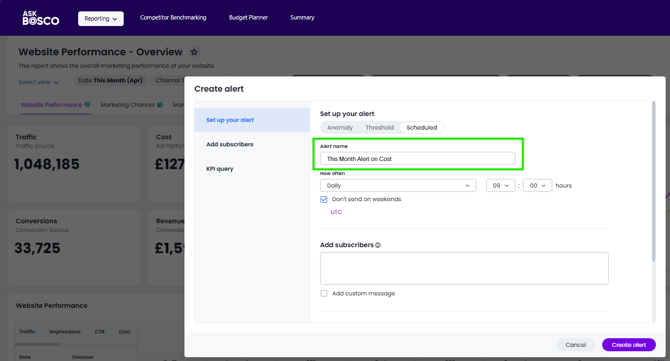
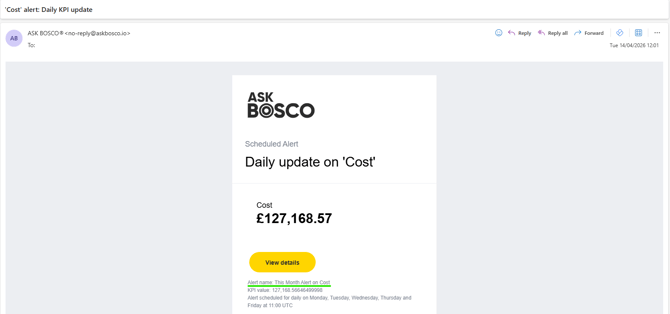
- When the email alert arrives the name will be stated in the body copy of the email
- [Optional] you can also add a custom message yo you alert to reinforce the alert basis.
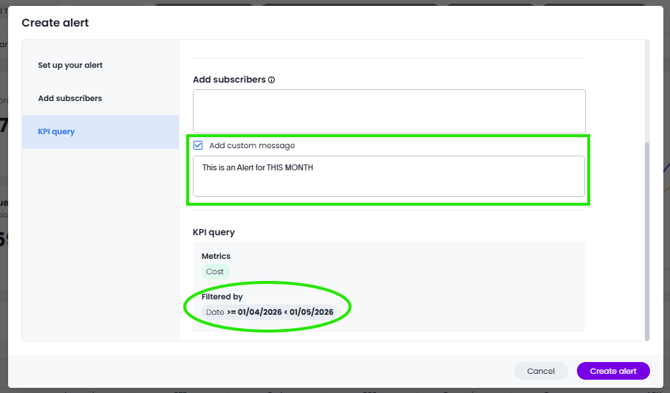
- Finally as seen above, the KPI Query table at the bottom will confirm the basis of the alert for you to check.
This Week Cost Update
To recieve an update on a differnt time frame eg This Week, you only need to change the filter on which the KPI chart is based and repeat the same steps
Adding subscribers to alerts
Your name automatically appears under Subscribers.
You must have view access to the data source underlying the KPI to schedule notifications for teammates who also have view access to the data source. You must have edit access to the data source underlying the KPI to schedule notifications for teammates regardless of whether they have access to the data source. If you experience any problems with accessing data please contact team@askbosco.io
If you have added subscribers to your KPI alert that do not have view access to the underlying data source, you can remove them from your KPI alert or give them view access when the Add view access window appears.
Managing Your Alerts
You can review and manage your alerts from the dashboard and visualisation on which has an alert has been created.
By clicking the three dots in the corner of a KPI visualisation you can then manage the alert(s).
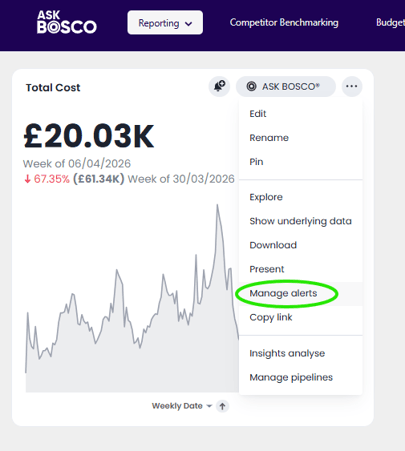
The list will show in the Manage alerts window
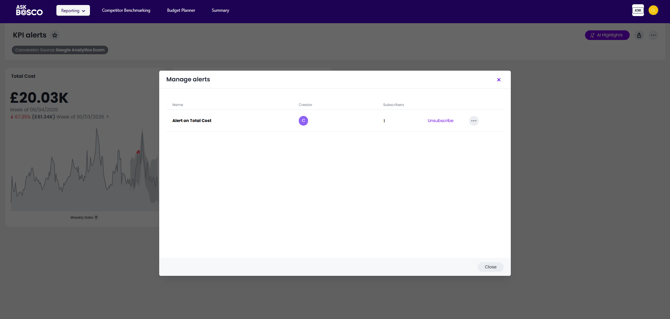
From here you can
- Unsubscribe from the alert
- Edit the alert
- Add subscribers to the alert
- Delete the alert
The Emails
Your alerts will come to you via the email address with which you log into ASK BOSCO®.
Initially you will receive and email notifying you of the alert creation and your subscription to it.
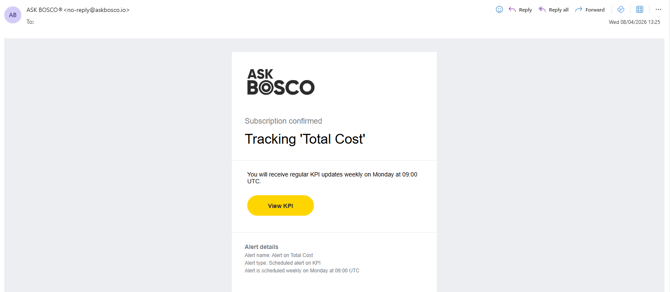
Then the alert will arrive in your inbox soon after the time you have scheduled it, until you cancel/delete the alert.
These emails will come from 'no-reply@askbosco.io'. Please check that this doesn't direct to your Junk mail folder.
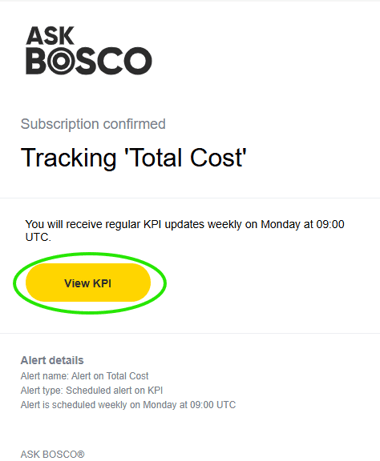
Each time you receive an alert you will also be able to view the KPI in ASK BOSCO®. Click View KPI to be taken to your ASK BOSCO® account and the KPI chart behind the alert.
Further Reading
You can learn more about KPI charts and how to create them in this article
 This article was prepared by Claire. If you have any questions please email team@askbosco.io
April 2026